Cabal trackball to joystick conversion
Cabal trackball version to joystick conversion complete guide
This tutorial is for those that have a Cabal original trackball version pcb but not its cab and want to use this pcb on a standard dual joystick cab with jamma connector. Since on the net there are only limited and no direct infos on this conversion and the only one present in Mame database is wrong, I've decided to write this document in the hope that it will be easily available to everybody.
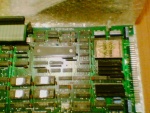
1) First, you must swap the main program code of your trackball version to the joystick version. The useful Mame romset is the -World joystick version-. Program four 27512 eprom or equivalent with respective romfiles (10.6j, 11.6h, 12.7j, 13.7h), remove the roms present at same location (6j, 6h, 7j ,7h) on the -bottom- pcb and replace them with the programmed eproms, still maintaining same locations.
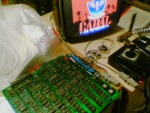
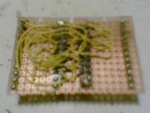
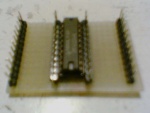
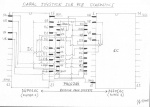
2) Second, remove the two D4701AC Incremental Encoder Counters at location 2C and 1C (they are near the jamma connector) and build an adaptor that respects my hand-made schematics in attachment (note that the two D4701AC are NOT required in the adaptor, only the 74ls244 ic must to be present). Then put it in the sockets in right way.
3) Third and last, add the ROLL inputs to jamma connector to make the pcb full jamma compatible. Since the trackball version doesn't use third button for both players (traces are not present on connector) the producer of game (TAD) in releasing the joystick version has provided this lack by the reuse of the -test- and -service- pins (no. 15 components side and no. 14 solder side respectively). So, add a jumper wire to pin 15 and pin 24 of components side for PLAYER 1 ROLL and a second jumper wire to pin 14 and pin 24 of solder side for PLAYER 2 ROLL.
That's all. Now connect pcb to a standard joystick jamma cab and have fun.
Credits:
Big thanks to Elgen >http://elgensrepairs.blogspot.co.uk< for the original adaptor connections info. Without his info the schematics (so entire tutorial) never came out
Wrote and designed by tirino73 >isolani1973@libero.it<
-
Joy conversion
-
Joy conversion 2
-

Joy conversion 3
-
Joy sub
-
Joy sub 2
-
Joy sub schematics


